28 June 2009

military grade ABC hazards


Saturday morning I leapt onto the little balcony of my kitchen, gasping for air, crying like a lost child. Tears and snot were running down my face and I had to grab the railing just to keep standing straight.

Most embarassingly, said balcony is on ground level, a pygmy porch really, and right next to our neighbour's garden. Of course, said neighbour was just out, fixing some corners of the pavement, and was now staring at me with that certain blank expression.

"Morning..." he said, choosing his words carefully, the way people normally do when dealing with other people covered in blood and wielding sharp objects. "Hay fever...?" he asked cautiously.

He's a sweet guy, though not a man of many words. As I was still struggling to regain my composure, all I could do was shake my head, which did little to restore my sanity in his eyes. Finally, after wiping my face with my t-shirt, I managed to get my head straight enough to reply.

"No. Onion soup."

Our neighbour just smiled politely, nodded and walked away. You know, that moderately swift, very inconspicous kind of walking away.

Poor guy.

I mean, it's probably not easy for them. Their house is build on the rear end of their lot, and basically every time they go anywhere, they have to pass right next to our kitchen. And in summer, our kitchen door onto the little balcony is always open.

So they have the questionable pleasure of being forced to witness stroboscopic snapshots of our life as it happens in the kitchen, or on the balcony respectively.

Somehow it always seems to be the guy standing around when I do something that looks especially eccentric, taken out of context as it is. Like dusting all the flowers with flour, or washing a hundredweight potatoes in a pink plastic tub or things like that. And just don't get me started on the burning pan...

This weekend, he learned that in my household, making onion soup apparently is an activity that entails military grade ABC hazards.

So what, he'll get over it. I did too, though I admittedly needed the help of a very dry Dry Martini. Well, maybe he did, too.

Onion soup has always been a staple in my family, growing up with francophile parents as I did. And it is dead easy to make, so it actually was one of the first proper recipes I added to my repertoire as a kid.

It is a simple hearty dish, yes, but with such a complex flavour that is rightly has its place among the great kitchen classics. At least that is what I am convinced of.

I especially like onion soup in summer, even though it's a rather warming dish. But it is a markedly assertive vegetarian option for a light summer dinner, filling yet not stuffing.

And by the way, concerning that other ABC hazard many people are concerned about when dealing with a lot of onions - I have never had that happen with anything made from fresh onions, nor do I know anyone. Maybe it's got something to do with the preservatives in pre-roasted onions. Or maybe something else entirely. Whatever the reason, as far as I can tell this soup is perfectly sociable. Apart from the teensy little bit of garlic, that is...


onion soup
(serves four)


about 1 kg onions
2 cloves garlic
100g butter

2 tablespoons flour
1 teaspoon sweet paprica
1/2 teaspoon ground anisseed
1/2 teaspoon thyme
cayenne pepper to taste

500ml dry white wine
750ml stock or water

crusty white bread
250g mild cheese (minimum!), like Gouda, Greyezer or Fontina, grated


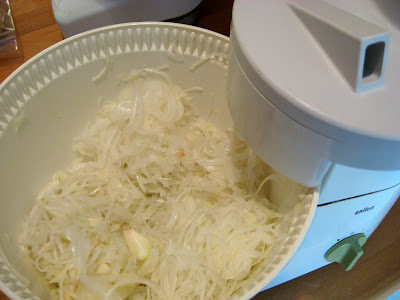
Peel the onions and cut into fine rings (or rather half-rings, for that matter). Peel and chop the garlic, or just throw into the vegetable slicer with the onions.
Usually, I have no problem cutting onions. Breathe in trough the mouth, out through the nose, and don't let the onion get close to your eyes. But this time, the combination of a still-lingering cold and the fact that I barely ever use my kitchen mixer's vegetable slicer for cutting onions made me drop my caution. All was fine while slicing the onions, but when I opened the thing to clean it, I got a whole whopping lung full of onion mist, and it worked like teargas. Hence me scaring our neighbour, again.
At least the cold was truly gone afterwards.


In a large pot, melt the butter over medium heat and add the onions. Boil until the moisture has evaporated, but make sure not to brown the onions. Reduce to low heat and simmer until very soft and fragrant, while stirring occasionally.
If you want, you can go all the way here and caramelize the onions in this step. That is, continuing to gently simmer them until they are brown(ish) and really sweet, without ever letting them get too hot else they would burn. This adds some more taste, but I can't find any real difference in the finished soup as long as the onions have had enough time to simmer on their own.

Add the flour and the spices, stir and simmer for a few more minutes.

Turn up the heat and add wine and stock, if you use water you might want to add some salt.
This recipe gives the wine / water ratio I prefer, but it works nicely with pure wine as well. Though I can't imagine the recipe working with water only... A shot glass of pastis or another strong anise liquor can be added at this stage for added complexity - if you like anise.

Bring to boil, then reduce heat and leave to simmer. Cook until the alcohol has evaporated, and the soup tastes sweet and harmonious, at least an hour, though longer is better here.
This is one thing that never fails to amaze me. The difference such a long cooking time makes is stunning especially as it is just time you add, no special ingredient. Well, then again, maybe time IS the special ingredient here. But it harmonizes the strong flavours of the soup, turning it from so-so to nom-nom.
I usually prepare this dish late morning, then leave it to simmer until I return into the kitchen for an afternoon tea. So I'd say, three or four hours simmering would be optimal.


Right before serving, heat up the grill of your oven. Slice the bread and toast lightly with some butter until crisp.

Distribute the soup into ovenproof bowls, put the bread on top and cover with cheese. Run under the very hot grill until the cheese is molten and bubbly, then serve immediately.

Can be served in small portions as a starter, or as given in this recipe, as a moderate main. Goes perfectly with most dry white wines.

27 June 2009

Julie, Julia and I


In this time of ever-spreading media cross-pollination, the usual order of 'How we learn about things' sometimes is more than just a little askew.

Several weeks ago, I stumbled across a new movie trailer for a movie I had never heard about before. Which is unusual in so far as I am a rather avid moviegoer and usually quite well aware of what's coming up.

Well, in this case, the whole affair had skipped me by. But the blib said something about cooking and it featured one of my favourite actresses, so I gave it a look.

Much to my surprise, this was a movie about a blog project, or at least half of it was. The blog project of a young woman cooking her way through all the recipes of some cookbook. The movie combined it with the life of the original cookbook's author herself, after her respective memoirs.

I had never heard of Julia Child nor the utterly adorable Julie / Julia Project before.

Which is was really a shame, for both Julia's recipes and Julie's adventures were things I could instantly relate to.

Julia's food is simple and basically saturated with butter, her instructions charming and wholeheartedly born out of a deep love for good eating - what's not to love about that? Her tips on how to make (and rescue a curdled) hollandaise are priceless on their own, let alone the wealth of useful information she has packed into her book. Somewhere in the introduction is a passage that strongly reminded me of Remy's imaginary chef telling him that 'anyone can cook'. If that's not a good thing, I don't know what is.

And Julie's experiences, with all their ups and downs, so often painfully and hilariously reminded me of my own. I think many of us can share the trauma of murdering a lobster, or the guilty embarassment of spending absurd amounts of money on some foodstuff, just as well as the beaming joy of seeing plates being licked clean and the deep feeling of accomplishment when you succesfully pulled off a dish that you barely even dared to tackle in the first place.

In short: Great stuff, both the book and the blog, and hopefully the movie, too. Go read.

And here's the trailer that, at least for me, started it all:


While thumbing my way through 'Mastering the Art of French Cooking', I came across this recipe for a 'gratin de poireaux', gratineed leeks with ham. Julie's comments on this had made me curious, and so I made a first attempt at it last night. Given that I always thought I didn't like leek that much, this dish was stunningly delicious. Deeply aromatic, plain and yet a little sophisticated, it just hits all the right notes for me.

Just remember that with the right combination of passion, fearlessness and butter, anything is possible.


gratin de poireaux
adapted from Julia Child's Mastering the Art of French Cooking
(serves two as a small meal)


4 leeks, about two fingers thick
1/4 teaspoon salt
150 ml water
50g butter

4 large slices cooked ham

180 ml cream
2 eggs
pepper
150g swiss cheese, grated
about 20g butter


Cut the roots and the greens off the leeks. Discard the roots and keep the greens to use in stock.

Clean the white stalks and put into a wide pot with the water, the salt and the butter. Boil until most of the water has evaporated, then reduce heat to barely a simmer and boil with lid on for about 20 minutes, until the leek is soft but not mushy yet.
Usually, the leek I get gives me whites about 20cm long, which fit nicely into the ham and my gratin dish both. Cut the stalks to the size you need before boiling, but usually the larger the pieces, the less work later.

Leave to cool for a moment. Take the stalks and wrap into a slice of ham individually. Put side by side into an oven-proof dish.

If there is more than two tablespoons of cooking liquid left in the pot, reduce until there are.

Combine the eggs, the cream, a little ground pepper and the reduced cooking liquid until smooth.
If your ham is particularly mild, you might want to add some more salt, but usually this should be more than enough.

Add the grated cheese, fold in and pour over the leeks, evenly distributig the cheese. Dot with butter.
Don't forget the butter. This is a Julia Child recipe, after all.

Bake in the oven at 190°C, until the top is nicely golden and puffed.

Can be served as a rich side or as a small main with salad and some potatoes. Reheats perfectly well.

21 June 2009

bread that actually tastes of something


As I have written in several places, this blog is at least partially about 'reclaiming lost favourites'. Most of the times, though, this means just trying to figure out how to make something I have eaten somewhere and never found a recipe for.

So with me currently working hard on learning how to make bread, it was only a matter of time before I started making the rye bread I knew from my childhood.

It is a rather common, plain bread that is sold all over Germany under what seems to me like several different names per town. What they all have in common is a dark crust, a moderately open crumb and distinct, hearty but not too pronounced taste. It is my bread of choice when you want a sandwich with bread that actually tastes of something.

I started out with Michel Suas' formula for wholegrain wheat bread, navigating by trial and error until I ended up with the bread I was looking for.

But can you imagine my utter astonishment when, after several attempts, it slowly dawned to me that what I had bought as 'rye bread' all my childhood long actually contained mere 30% rye flour?

I mean, those breads always were labeled 'Roggenmischbrot' in the small print, which roughly translates as 'partial rye bread', but 30%? Come on, you gotta be kidding!

But, as widespread tastings in my family confirmed, not kidding at all. This IS the bread I was looking for, and it is as good as any store-bought version. Well, actually I think it's better, because even though I'll probably never get this thick crust in my oven as they do in a bakery, it tastes great, keeps much better than a normal one and makes me proud each time I look at it.

Not much more one can ask of a bread, can you? (Except calling it the right name, for that matter...)


'Partial' Rye Bread
(makes one 1.2 kg loaf)


levain
100g wholegrain rye flour (German type 1150)
50ml water
80g sourdough starter (100% hydration rye)

final dough
100g wholegrain rye flour (German type 1150)
100g high-gluten wheat flour (German type 550)
350g wholegrain wheat flour (German type 1050)
3 teaspoons salt
1 teaspoon dry yeast
420 ml water, lukewarm


The day before baking, mix all the ingredients for the levain and leave to ferment for 12 hours at room temperature.
In my household, twelve hours are over exactly when I am ready to make the final dough the day after I made the levain. ^^

The day of baking, mix all the remaining ingredients with the levain and knead until medium gluten developement.
Meaning: until the dough starts clearing the bowl or stops being a sticky mess.

Leave to proof for 2 hours at room temperature.

Then, shape into a light ball, if possible without de-gassing the dough, and leave to rest for another half an hour.
Simplest way to pre-shape the dough would be pouring it onto a lightly floured surface and tucking the fringes underneath itself just once or twice so it is more or less round and the dough's surface taut as a bedsheet.


After that, shape the dough again as above, this time turning it around and sealing the seam with a few deft pinches. Put seam-up into a well-floured couche and leave to proof for another 1,5 hours.
My 'couche' is a colander with a floured tea-towel inside, and it works like a charm. It even leaves a faint pattern on the loaves as the colander's holes are arranged in circles, so I don't see any point in getting something 'professional'.
90 minutes are the absolute maximum for the final proof - I somehow lost my schedule this morning and the bread went into the oven 15 minutes later than planned. As you can see, it was already overproofed, not yielding any mentionable oven spring.


Preheat the oven to 250°C.
Do this ahead of time, unlike me. See above.

Once the dough is ready, transfer onto a baking sheet and score.
Score - cut a cross or some pattern into the top of the loaf with a very sharp knife.

Bake at a low rack with steam for about 10 minutes, then reduce the temperature to 230°C. Bake for another 30 minutes until the crust is dark and fragrant.
For baking with steam see my descriptions here.

Switch off the oven but leave the bread inside to cool for another 10 to 15 minutes with the door ajar inprove the crust.

Set on a rack to cool completely before cutting.


P.S.: Once again, this post is submitted to the YeastSpotting section of Susan's formidable blog Wild Yeast. Check it out, it is a great resource and inspiration for all home bakers!

17 June 2009

fraises des bois


I always knew it was a good idea to have a garden that's not exactly neat, and filled with all the pretty plants I could legally drag out of the nearby forest.

But now look at this:


Veritabel fraises des bois have conquered the shady rear corner of our 'tea pavillion', and they are as fragrant and tiny and delicious as they look. I am so proud of them, as if I had anything more to do but spot them in a corner in the forest and dig out a few tiny plants to relocate in our garden.

But I am so happy to see them thrive like this!

15 June 2009

naturally more annoyed


Last weekend, I had actually planned on posting about our 'Riz al Aldalus', the dish that passes as paella in our household.

Unfortunately, it was also the weekend that my old computer kind of decided to finally quit his post and the new one was acting up a complete *bleep*. Which of course didn't do any real harm but ruining my plans for the weekend, and actually getting my so annoyed that I completely forgot taking any pictures of the food. Which in turn got me even more annoyed, naturally.

As there is little to no point in posting recipes without pictures in my eyes, I decided to make up for this miserable failure by posting an old picture of my gambas con aioli that I found while installing the new computer.


Nothing new, I know, but it is a nice picture of a lovely meal and a nice memory of a lovely evening. See, I am feel much better already.

And as I will surely make the 'Riz al Aldalus' again one of these days, there'll be more than enough opportunities to post it here properly.

skip the meal in favor of the bread


Finally, there seems to be some kind of consolidation in my household.

After the last weeks seem to have been filled with nothing but cooking experiments (with no proper results to speak of) and not only one, but two computers simultaneously acting up (that being my old one, which had a proper meltdown, AND the new replacement), slowly things become a little more productive here.

Most importantly, the cheese sticks now are up to standard, finally. I have already complained about my first failure here, but since then, there have been quite some more. Most annoying was the last one, with the sticks turning out nicely but me being a complete slob and forgetting to note how much water I used in the final dough, that way rendering my complete recipe useless (insert the sound of grinding teeth here).

But, as I already mentionend, they turn out nice each time by now, and I have the recipe here to prove it. Can you tell I am happy that I can now finally discard the note on my kitchen pinboard saying 'bake me: cheese sticks'?

I bet you can.

These cheesesticks basically are strips of bread dough with cheese in between, both chewy and crispy at the same time, and a perfect snack or addition to a salad. The combination of rye and spelt in a sourdough make for a surprisingly complex, tangy taste, and the salty-creamy cheese just goes along very nicely.
The only drawback is that they are quite filling, and definitely nothing I'd serve as a nibble with a drink before the actual meal. But, as with pretzels or similar goods, one can always skip the meal in favor of the bread...


Sourdough Cheese Sticks
(makes about one dozen)


250g wholegrain rye flour (German type 1150)
2 tablespoons rye sourdough starter (100% hydration)
125ml water

250g wholegrain spelt flour (alternatively: wholegrain wheat flour, German type 1050)
2 teaspoons salt
1 teaspoon active dry yeast
220ml water

250g Gruyere cheese, grated


On the day before baking, mix the starter, the rye flour and the water to a firm dough. Cover and leave to ferment at room temperature for a day.
This dough is too dry to show any significant raise during this time, but this is mostly to build taste, and (I think that) the final product benefits from a drier pre-dough. (Does this qualify as a biga, actually?)
Also, during the chaos of the last days, I was forced to keep one batch fermenting for two days. It didn't do any harm, actually, I found the taste strong but rather pleasant.


On the day of baking, add the spelt flour, the salt, the yeast and the remaining water. Knead until smooth, or, if you are using wheat flour instead, until you can see the first signs of gluten developement. Leave to proof for an hour at room temperature.
Once again, as this dough has no need to hold any significant amounts of air, proofing time isn't crucial, though I personally find that a longer and cooler proofing phase always adds to the final taste.

Preheat the oven to about 250°C.

On a well-floured surface, roll out the dough, trying to get it as rectangular as possible, about as thick as a pencil.
This dough can be rather sticky at times, so be warned.

Spread the grated cheese over one half of the dough. Cover the cheese with the remaining half of the dough and press down slightly to get (most of) the air out.

Cut the dough in strips about two fingers wide and as long as they fit into your oven. Transfer the sticks onto your baking sheet and twist them like you can see in the picture above. Also, place them closely together, this way you'll lose as little cheese as possible.
For me, the easiest way was to take the dough with one end in each hand and then twisting from the middle outwards, with as much of the dough resting on the baking sheet as possible. This way the rather soft dough wouldn't break.

Bake at a low rack with steam for about 15 minutes, until the tips of the cheese-sticks start turning dark brown, then take out onto a rack and leave to cool.

If not served right away, the cheese sticks keep best if immediately wrapped airtight, else they dry out quite quickly. They keep like this for up to three days but also freeze very nicely, as long as you let them thaw at room temperature.

They hold very well on their own as a snack with beer or wine (think pretzels), but also make a great, hearty side for a salad.


P.S.: Once again, this post is submitted to the YeastSpotting section of Susan's formidable blog Wild Yeast. Check it out, it is a great resource and inspiration for all home bakers.

01 June 2009

such petite little things


I think there has been written more about madeleines than those delicate little things can bear. From Marcel Proust to almost every blogger out here everyone has an opinion on them.

So far I managed to abstain from adding my pinch of salt to this sea of words. But, as it seems to be the thing with resolutions, this week I see no way around it.

I mean, this blog is supposed to be about what I do in my kitchen, about learning new things and reclaiming old favorites. I couldn't just omit a crucial staple of our household just because it is a common thing, could I now?

Basically, it is all the fault of my father-in-law. Since I have known him, he's been very fond of madeleines. Bagged, industrial fare with more additives than can possibly fit into such petite little things, but still he loves them none the less.

Naturally, his favourite brand was 'discontinued' one of these days. When we were on holiday in France last spring, he tried various brands of madeleines from the french shops, and was reasonably happy with the stock we brought home. But naturally, those didn't last forever, and soon enough it was my job to learn how to make them myself.

I had never been much a fan of madeleines, I have to admit, until the moment I pulled my first batch out of the oven. They are not more than rather plain, cookie-sized cakes really, but they are lovely, suffused with the aromes of brown butter and caramel when fresh, and still moist and soft and comforting after two weeks in a jar.

I am pretty much in love with them right now, and there is hardly a month where I am not making at least one batch of them to refill the big bow of them in our larder, as it was the case this weekend. It just isn't a proper home without them.

This particular recipe was adapted from Suas' Advanced Bread and Pastry, a book I can only recommend to anyone interested in the matter.

It is the plain, unfancy version, delicious and by far my favourite, but there are like a million ways to add some more colour to this recipe. Have a look at Dorie Greenspan's marvelous blog, for example, she'll give you enough ideas to last a lifetime.

Some of them are a little dark, technically. But I have to admit that I like them best this way...


Madeleines
(makes about 60 small cookies)


300g butter

300g flour
9g (about three flattened teaspoons) baking powder

280g unrefined cane sugar
a generous pinch of salt
50g honey
5 eggs


In a small pot or measuring jar, melt the butter and set aside to cool.
Some recipes suggest to use brown butter, but I have tried and couldn't find any difference, so I skip that part.

Sift the flour with the baking powder and set aside.
Usually, I am not one for sifting flour as it seems a pretty pointless effort to me nowadays. But in this case, where you try to agitate the dough as little as possible, getting the flour as fluffy as possible actually makes a difference.

In a mixing bowl, blend the eggs with the sugar, the salt and the honey with a wooden spoon or a rubber spatula, until the sugar has mostly dissolved.
There is no need to work in air at this moment, and also you don't have to go on mixing all the time. I usually just stir the eggs into the sugar and then clean up the kitchen, once I am done the sugar has almost gone already.

Gently fold in the flour, mixing only until the flour is almost incorporated.

Add the cool but still liquid butter and fold in until just incorporated.

Cool for at least two hours, best overnight.

Neat, isn't it?

Preheat your oven to 240°C, and prepare your madeleine molds.
My madeleine molds are well-used, so I don't have to grease them any longer. I merely wipe them with a paper towel before each use, and never put them in the dishwasher. If yours are new, you'll probably have to grease them lightly.

Pipe the cooled dough into the molds, filling each shell to about three quarters.
If you don't bake them immediately, put the molds in the fridge. It seems the colder the dough, the nicer the madeleines.

Put the molds into the oven and immediately reduce the temperature to 170°C. Bake until well bronzed and matte on top.
Madeleines are a little sensitive to variations in heat, so baking time and position in your oven might vary significantly from mine.

Once done, take the madeleines out and leave to cool for a few minutes. Unmold the madeleines as soon as you can and leave them on a cookie rack to cool completely.

They are best fresh, as long as they are still a little crisp and taste of brown butter caramel. From the second day on, they are still very nice, and keep amazingly well in the fridge.
My father-in-law keeps a constant reserve of these little treats in the office fridge to go with his daily coffee, and he swears they would last perfectly for several weeks if ever he would let any of them get old enough.